Installing Velvet- Ride Shackles
On a Chevrolet 2500HD
| Heavy duty trucks are designed to handle
loads with ease. However, the suspension on these vehicles gives a harsh
ride when the vehicle is unloaded. Lord Corporation has come up with a
solution. By changing the rear spring shackle to a two-piece unit that
pivots in the middle, the unloaded ride can be improved. The
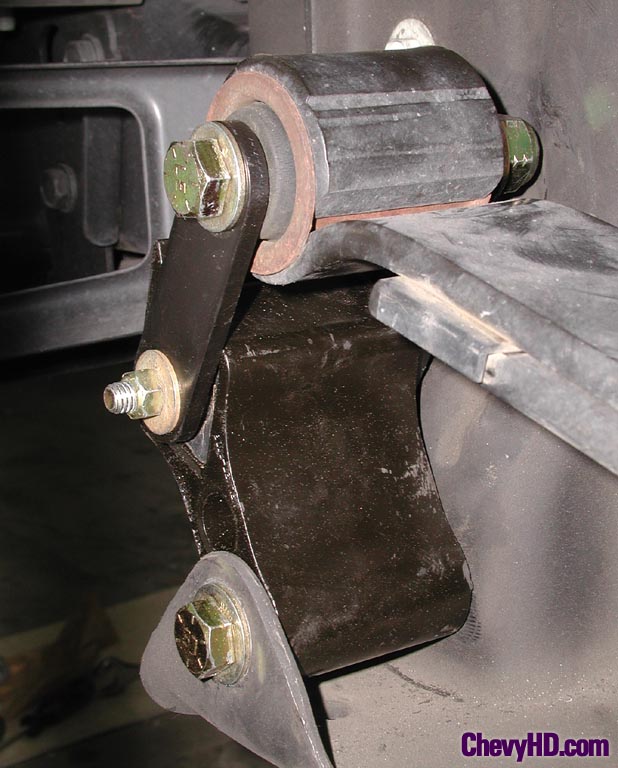
key to the Velvet-Ride shackle is the torsion busing. This rubber
bushing in the center of the Velvet-Ride shackle allows the shackle to
stretch and compress several inches.
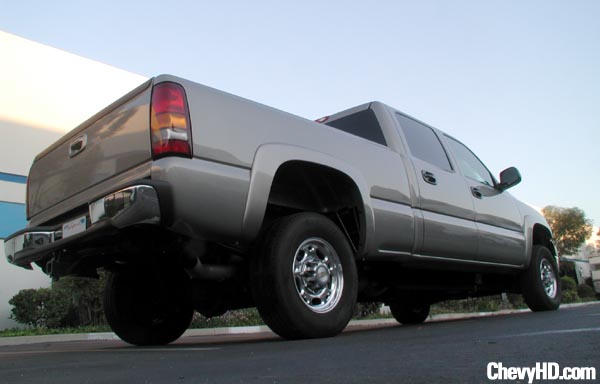
Tired of the constant bucking, hopping, and skipping we experienced using this truck on a daily basis, we decided to try a set of these on our 2002 Chevrolet 2500HD Crew Cab 4x4. The installation took about two hours on this particular vehicle, mostly due to the steps needed to remove the stock shackle bolts. Follow along as we install the Velvet-Ride shackles. At the end, you'll find our driving impressions. |
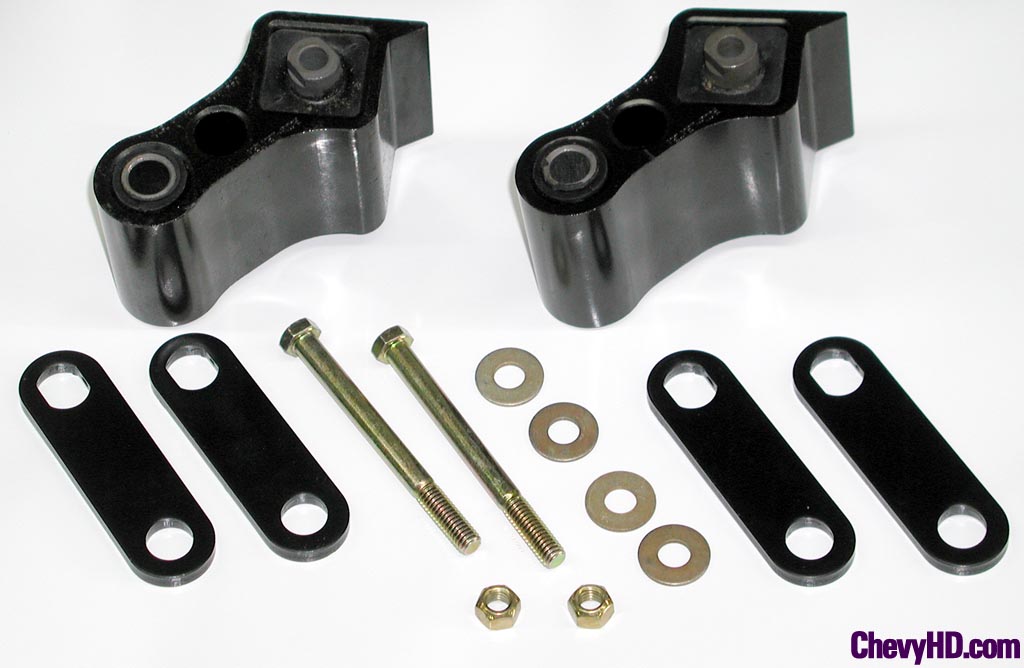 |
The shackles are packed in a surprisingly small,
5-inch square box. We begin to wonder if nine pounds of steel and rubber
can help tame a 7000 pound truck.
The Velvet-Rides come unassembled, and consist of cast steel housings with pressed-in rubber bushings, four steel legs, and grade-8 hardware. |
| Using wrenches, we assemble the shackles. The arms of the shackle fit snugly onto the flats of the center shaft. We maneuvered them into place with a rubber mallet. Be sure to align them as shown in the diagrams included in the instruction manual, the end result is one right-hand and left-hand shackle. | 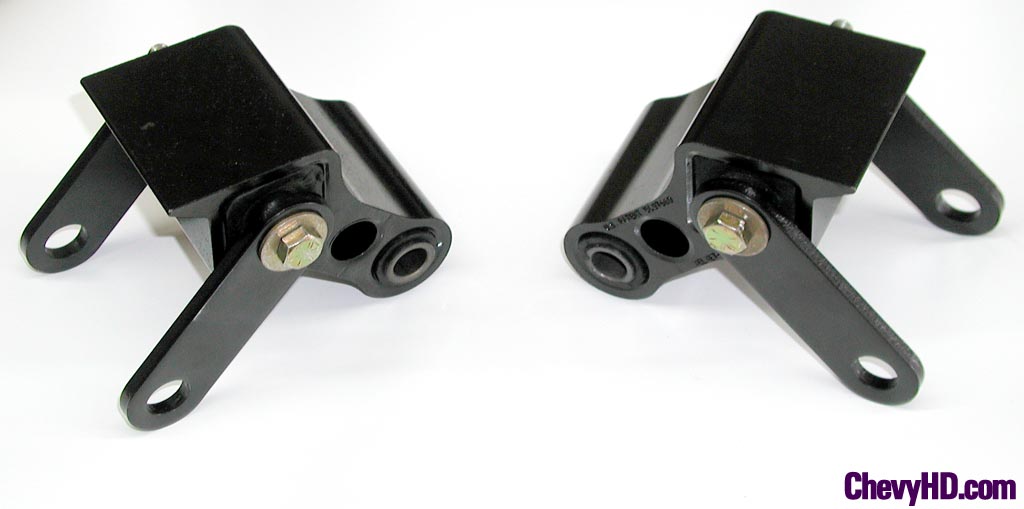 |
 |
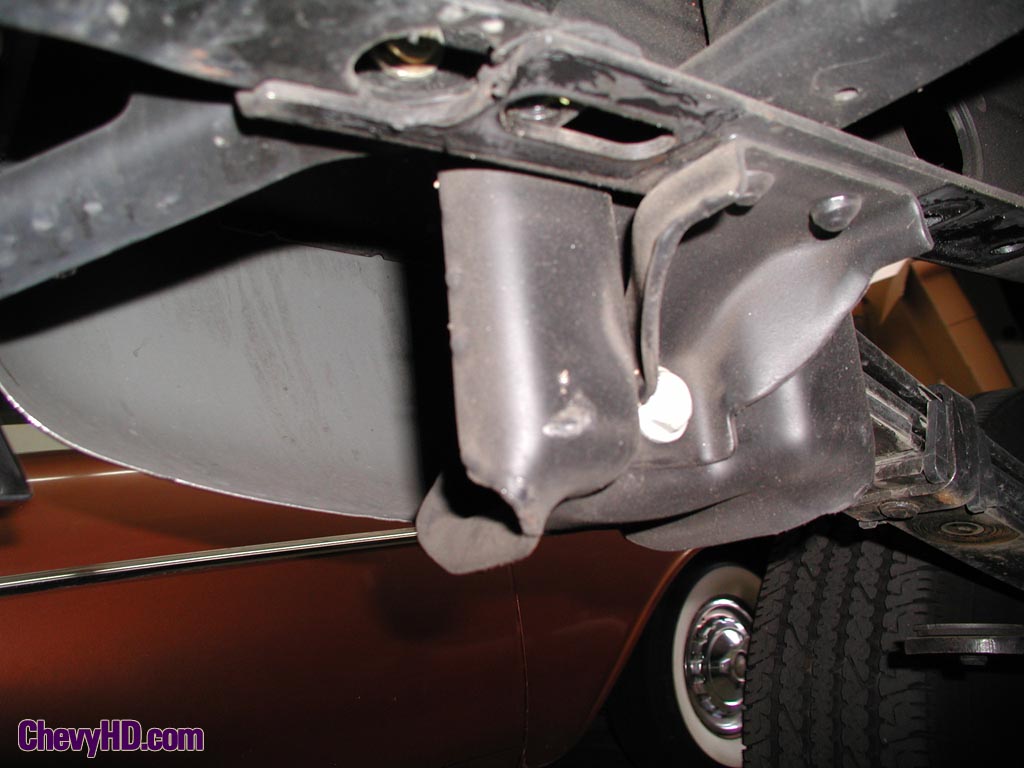
Prepare the truck for installation. First, chock the front tires so the truck won't roll away. Next, jack the vehicle from the center of the rear axle on the differential housing. Once the tires are a several inches off the ground, align the jack stands under the rear frame rails. We placed ours just forward of the spring hangers. When you lower the jack, the tires should still be off the ground. |
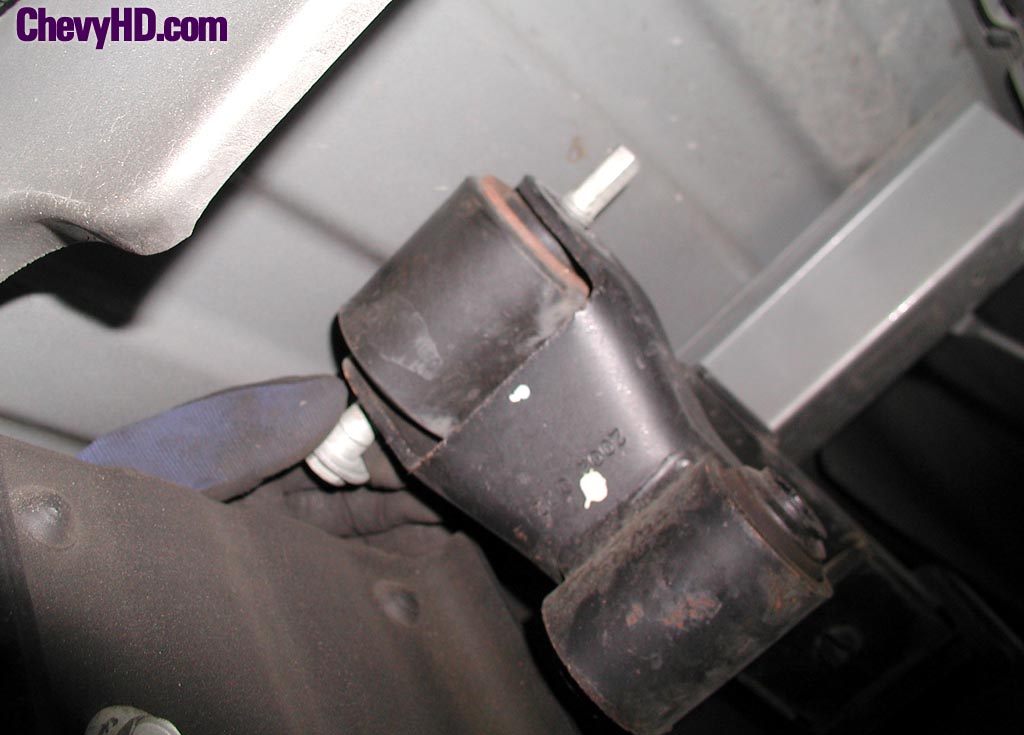
| As you can see, the stock shackles are installed with the bolts heads facing the frame. While this may have worked fine during assembly of the truck, it makes removing the shackles a chore. | 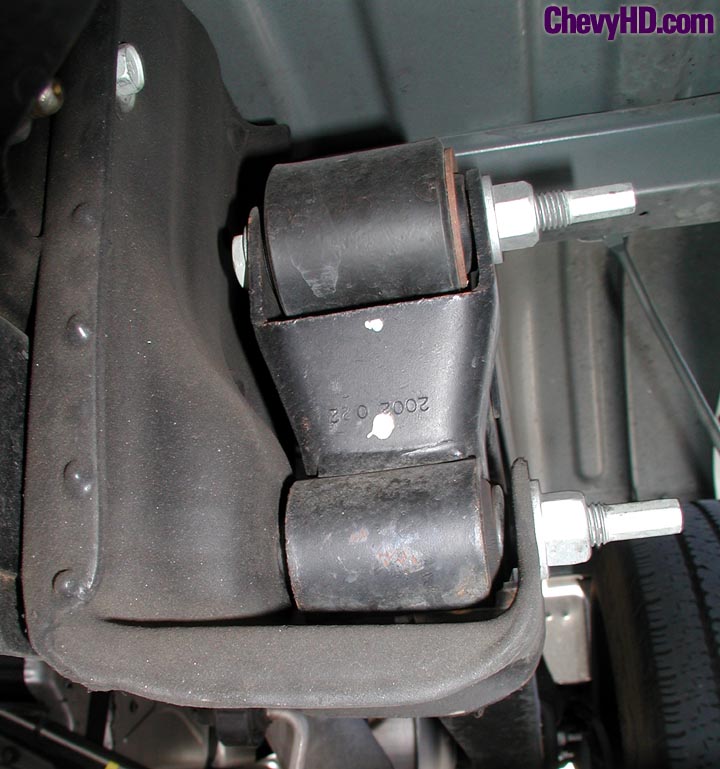 |
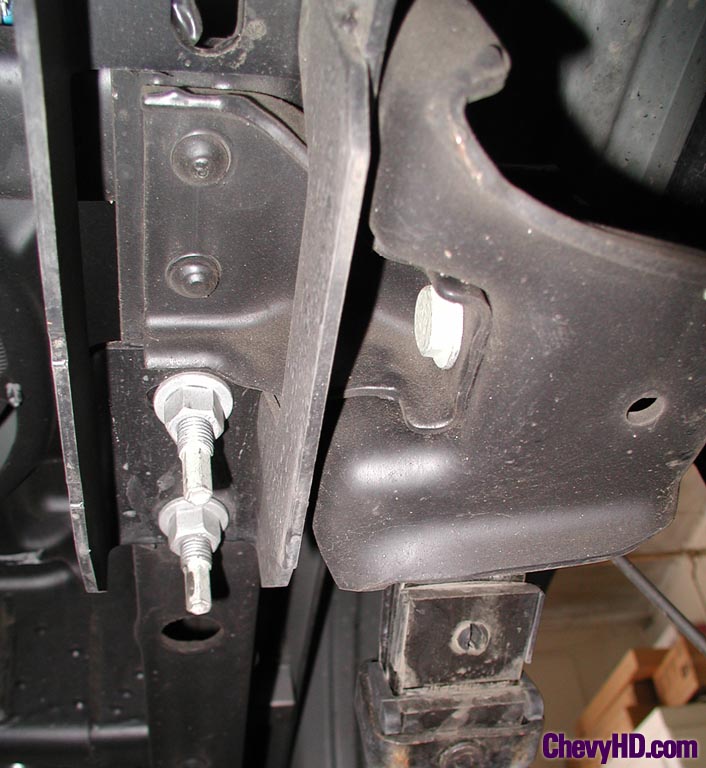 |
The head of bottom shackle bolt (in
the center of this picture) will hit the trailer hitch when you try to
remove the bolt, so the hitch must first be removed.
Disconnect the wires running to the plug on the hitch, release the wiring harness from the clip on the back of the hitch, and remove the eight bolts holding the hitch. |
| Before you remove the last two bolt, place a jack stand under one side of the hitch. This will allow for one-man removal and installation of the hitch. | 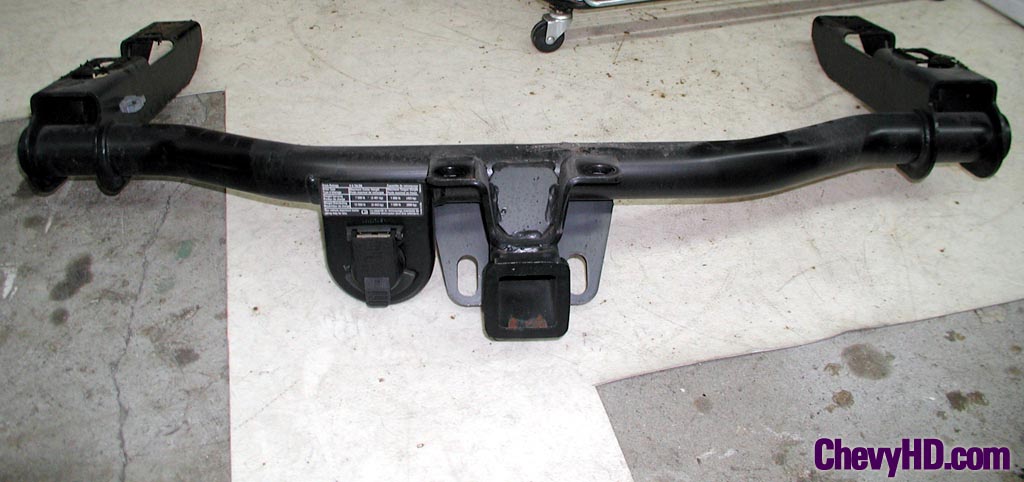 |
 |
With the hitch set aside, you can now begin to remove the shackle bolts. First, remove the nuts from the shackle bolts. |
With the jack under the differential, lift the axle until all weight is off of the leaf springs. Wiggle the bottom shackle bolt as you jack the axle. You should be able to feel when there is no weight on the shackle. Once properly jacked, the bottom shackle bolt should slide out. Repeat this process on the other side of the truck. Once you remove the bottom bolts from both shackles, you should be able to jack up the springs far enough to clear the bolts over the top of the frame rails. |
 |
 |
If you try to do one side at a time, you will not be able to remove the shackle bolt. When you jack the axle with only one side removed, the axle will move up on one side and not the other. This will cause the leaf spring to twist just enough so that the bolt head will hit a rivet on the top of the frame rail. |
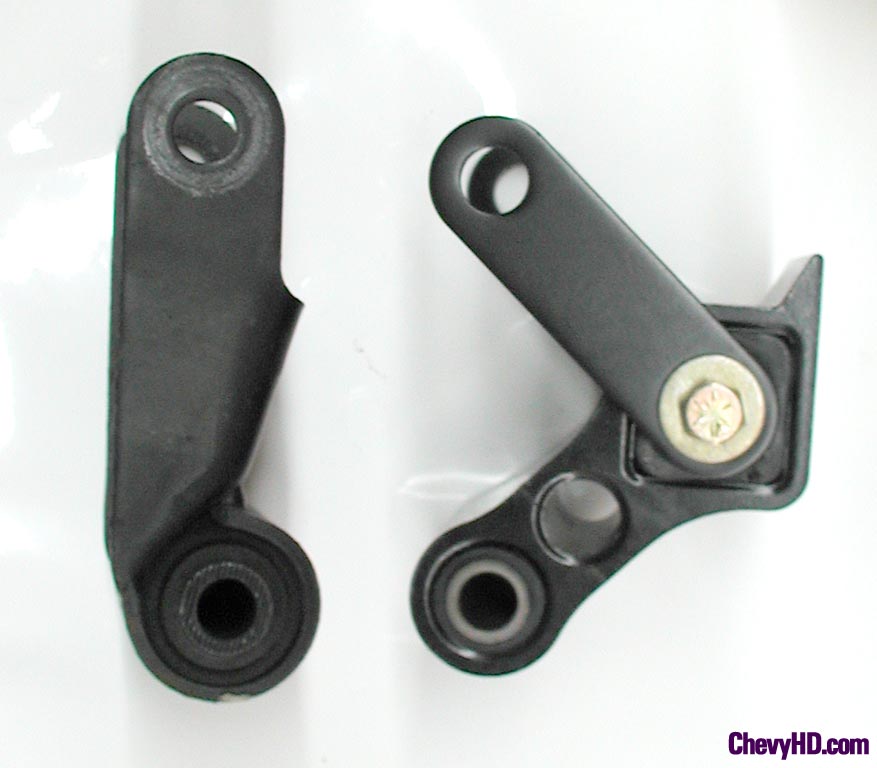
Here is a comparison between a stock shackle (left) and the new Velvet-Ride shackle (right). As you can see, the new shackle is roughly the same length as the stock shackle in its static position. When weight is applied to the shackle, it will stretch. It can stretch and compress more easily than the leaf spring. When enough weight is added, this shackle will stretch to its maximum length (and become straight), essentially locking the Velvet-ride shackle out. |
 |
 |
The shackles can be installed using the stock bolts
and nuts. We will be changing the leaf springs in the future. Rather
than to go through the same hassle we just went through to get the
stock shackles off, so we want to put the bolts on with the heads facing
out. The stock bolts are too long for this, so we went looking for some
different hardware.
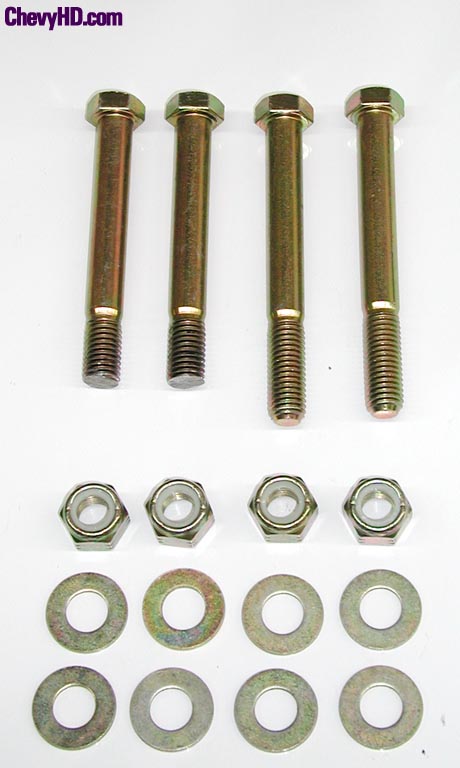
We decided on these 9/16-inch grade-8 bolts, nylon-insert lock nuts, and washers. We were in a hurry and only able to find 5-inch length bolts at the local industrial supplier. The bolts work fine on the bottom of the shackles, but the top bolts are a little too long and would hit the shackle hanger. Instead of using a spacer, we opted to remove about a half-inch from two of the bolts. If you can find 4.5-inch length grade-8 bolts, they will work without any modification. |
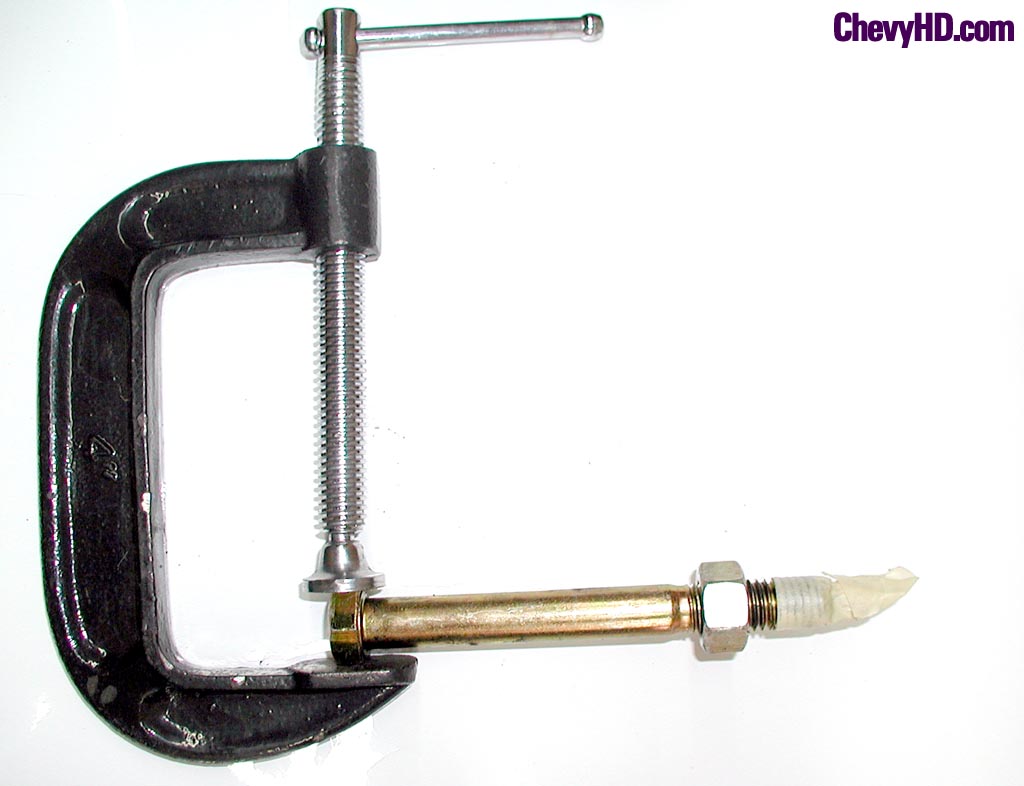
We backed a standard grade- 8 nut onto the bolt to act as a sacrificial nut to help clear the threads once the bolt is cut. We then marked the bolt with masking tape, clamped it and cut it using an abrasive disc. A little filing cleared the threads and removed the sharp edges. Once that was done, the nut was easily removed. |
 |
 |
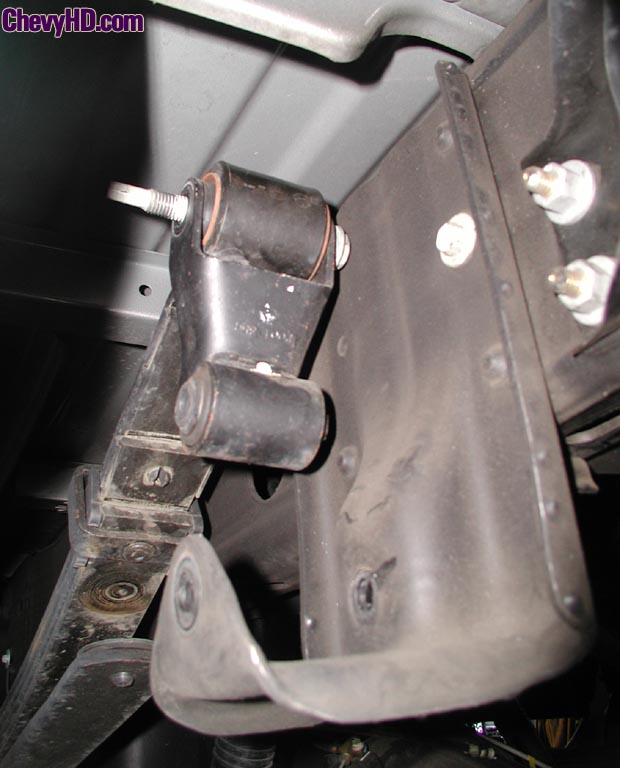
The Velvet-Ride shackles can then be installed. Make sure that the center bolt has its head facing the shackle hanger. If you install it the wrong way, the tip of the bolt will hit the shackle hanger. Torque everything down, reinstall the hitch, and double-check the shackles and all bolts for proper clearance. |
| Now that you have seen how to install the
Velvet-Ride shackles, the most important question still remains, do they
work?
We took the truck out for a test drive on familiar roads, including the dips, driveways, and railroad tracks we encounter on a daily basis. We were extremely impressed with the results. The shackles take the edge off many the hard jolts we previously experienced. Instead of slowing down as we often do, we charged full-speed at the most annoying obstacles. The truck just ate them up. Most sharp jolts are now 50% to 75% reduced, and instead of jumping, the truck seems to glide over most disturbances. The rough ride on certain roads is not completely eliminated, but overall the ride is improved. The ride is now half as bouncy and much less jerky. Stiffer shocks would complement this suspension modification nicely, and should help reduce the bouncing on uneven roads. We were most impressed with the improvement while cornering on uneven surfaces. Previously the truck tended to hop and skip when cornering quickly. Not only is this annoying, but it can also be dangerous. These shackles really seem to help in this aspect. If that alone were the only benefit, we would say these shackles would be worth their price. It is still apparent that this is a heavy duty truck. The front torsion bars still overcompensate when the vehicle is unloaded, which is to be expected. This is a vehicle capable of towing well over twice its weight. Because the shackles change in length as load is applied, they do affect the ride-height of the vehicle. Upon initial installation, the rear dropped by 1/2-inch. When measured a day later, the rear had settled to almost 1-inch below stock height. This change is barely noticeable when looking at the truck, and when it is not loaded, the rear is still a couple inches higher than the front. When loaded, the rear will be a couple inches lower over stock. If the rear-end squat is too much, an air-over-leaf airbag assist system can be used level the truck when it is heavily loaded. ChevyHD.com |